Skip to content
Improper blade installation1 causes early damage and costly downtime. Your team faces risks, and production suffers. A proper process ensures safety and peak performance from day one.
To ensure safe, efficient installation, start with full safety preparations like wearing PPE and locking out the machine. Then, follow a detailed, step-by-step process covering cleaning, alignment, correct torque, and thorough post-installation checks. This maximizes blade life and protects your operators.

A small oversight during installation can create massive problems down the line. The precision of your cut, the lifespan of your blade, and most importantly, the safety of your team, all hinge on doing this critical step correctly. A well-installed blade is the foundation of a productive and safe operation. It is not just a maintenance task; it is a critical process point that defines the quality of your output and the reliability of your machinery. Let's explore the common pitfalls and the best practices that will empower your team to master this process.
What Are Common Industrial Blade Installation Errors And How To Troubleshoot Them?
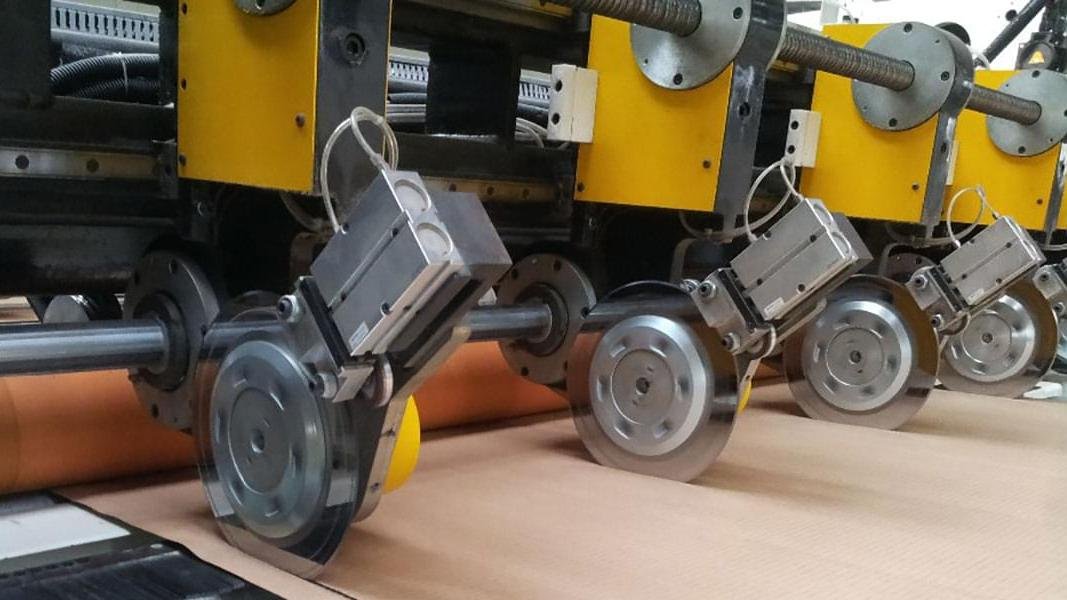
You just installed a brand-new blade, but the cut quality is already poor. This is a frustrating and common problem. These issues often point to simple installation mistakes.
Common errors are incorrect torque, dirty mounting surfaces, and blade misalignment2. To fix this, always use a calibrated torque wrench, clean all surfaces meticulously, confirm correct alignment, and check that the blade-to-anvil clearance3 is set to the manufacturer's specification.
Let's look at a specific case. I once worked with a client, let's call him Dylan from a large packaging plant in Brazil. His team was frustrated because their new slitter blades were chipping within the first week of use. After we discussed their installation procedure, we found two small but critical errors. First, they were tightening the bolts by "feel" instead of using a torque wrench. Second, they were only giving the blade holders a quick wipe instead of a deep clean. Even a tiny piece of debris, thinner than a human hair, can act as a fulcrum. It creates an uneven pressure point on the blade's body. This concentrated stress leads to micro-cracks that grow with every rotation, eventually causing the blade to chip or fail catastrophically. The same principle applies to torque. Uneven tightening means one side of the blade is under more pressure, which can warp the blade and the holder over time. We helped them create a simple troubleshooting checklist.
Troubleshooting Common Installation Errors
| Common Error | Likely Symptom | How to Fix It |
|---|---|---|
| Incorrect or Uneven Torque | Blade vibration, premature dulling, broken bolts. | Always use a calibrated torque wrench. Tighten bolts in a star pattern to the exact specification in your machine manual. |
| Dirty Mounting Surfaces | Poor cut quality, chatter marks, blade chipping. | Stop and deep clean. Use a solvent to remove all oil, grease, and rust from the blade and the holder. |
| Blade Misalignment | Frayed edges on material, excessive friction, blade overheating. | Loosen the blade. Use the machine's guide pins or a dial indicator to ensure it is perfectly seated and parallel. |
| Incorrect Blade Clearance | Blade-on-blade impact (too close) or crushing material (too far). | Refer to your manual for the exact gap setting for your material. Use feeler gauges to set it precisely. |
By implementing this checklist, His team eliminated the guesswork. Their blade chipping4 issues disappeared, and their blade lifespan increased by over 40%. It showed them that precision in installation is just as important as the precision of the blade itself.
What Safety Gear Is Essential Before Starting Blade Installation?
Handling sharp, heavy industrial blades is a high-risk task. A moment of distraction can lead to a life-altering injury. The right gear removes the fear and allows for focus.
Essential safety gear includes high-level cut-resistant gloves, safety glasses or a face shield, and steel-toed, slip-resistant footwear. More importantly, always perform a full Lockout/Tagout (LOTO)5 procedure to de-energize the machine completely before starting any work.
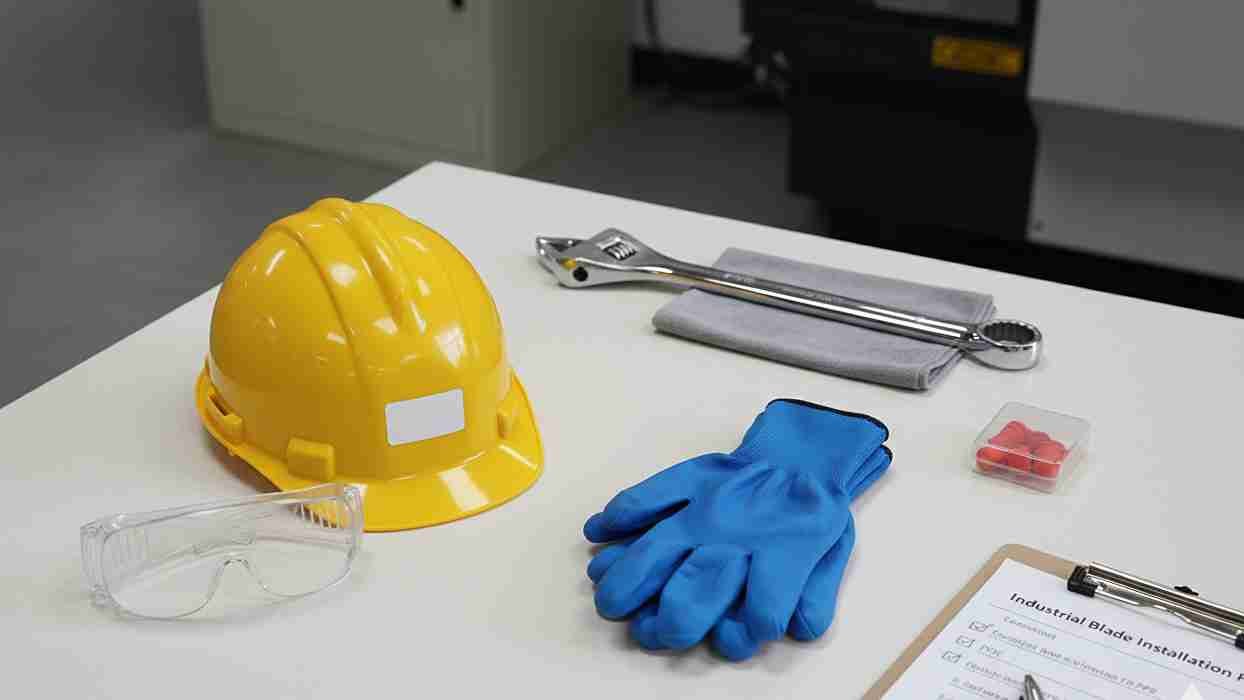
Safety is not just a list of items to wear; it's a mindset that starts before you even approach the machine. The single most important safety step is Lockout/Tagout (LOTO). This is a formal procedure to ensure a machine is completely shut off and cannot be started again while it's being serviced. This means isolating it from all energy sources. Most people think of electricity, but you must also account for stored energy. This includes trapped pressure in hydraulic or pneumatic lines, which can cause parts to move unexpectedly. It also includes gravity; heavy machine components must be physically blocked or secured so they can't fall. A lock on the main power switch with a tag that says "Do Not Operate" is the universal sign that a life is on the line. Once the machine is verified to be at a zero-energy state, you can focus on personal protective equipment (PPE). This is your last line of defense. A dropped slitter knife, weighing several pounds, has enough force to crush the bones in a foot that is not protected by a safety shoe.
Your Non-Negotiable Blade Handling Safety Kit
| Gear | Purpose | Key Feature to Look For |
|---|---|---|
| Cut-Resistant Gloves | Protects hands from razor-sharp edges. | Choose a high ANSI/ISEA A5 cut level or higher. Ensure they still offer good dexterity. |
| Safety Glasses/Face Shield | Protects eyes from flying debris or shattered parts. | Must be Z87+ rated for high impact. A face shield offers more complete protection. |
| Steel-Toed Safety Shoes | Protects feet from dropped blades or tools. | Should have slip-resistant soles to prevent falls around machinery. |
| Lockout/Tagout (LOTO) Kit | Isolates all machine energy sources. | Includes a dedicated lock, tag, and hasp for each person working on the machine. |
I always advise managers to make this kit easily accessible and its use mandatory. A strong safety culture doesn't just prevent accidents; it creates a more focused and professional team. When people feel safe, they do better work.
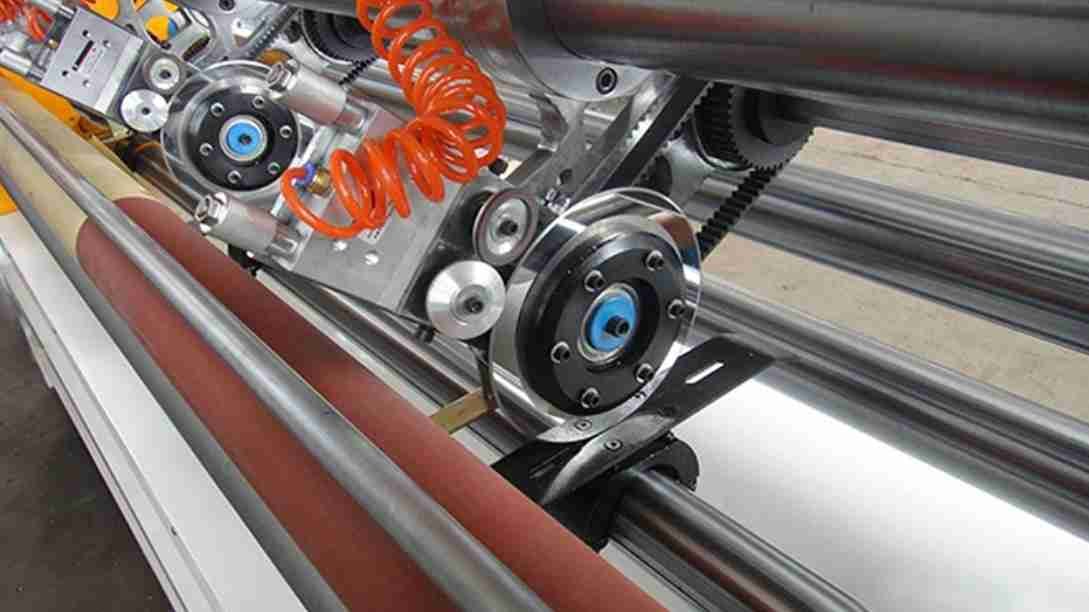
How Does A Standardized Installation Process Boost Blade Lifespan?
Are your blades wearing out faster than the manufacturer promised? Inconsistent installation is often the silent killer of blade performance. A repeatable process is your best insurance policy for longevity.
A standardized process ensures every installation is perfect by eliminating guesswork. Following a step-by-step checklist for cleaning, aligning, torqueing, and testing reduces stress on the blade. This prevents premature damage and can dramatically extend your blade's operational lifespan.
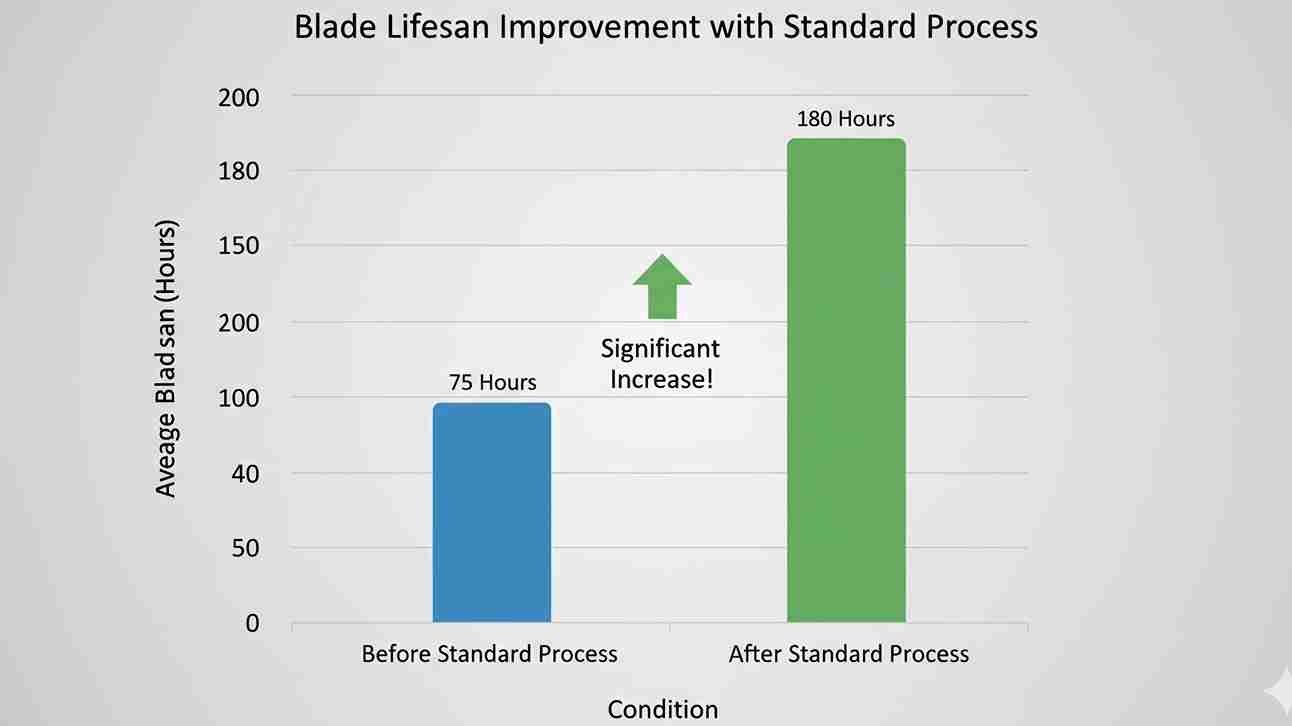
Think of it as a pilot’s pre-flight checklist. It guarantees that no critical step is forgotten, no matter how experienced the technician is. We've helped many clients develop a simple but powerful installation procedure that directly translates to longer blade life and less downtime. A textile company I worked with was struggling with inconsistent slitting quality. We found that different shifts had their own "tricks" for installing blades. There was no single source of truth. By implementing a documented 10-step process, they created consistency. This not only improved cut quality but also gave them predictable blade wear, allowing for better maintenance scheduling. Their blade life increased by 30% because every blade was now operating under ideal conditions. The steps themselves are simple, but following them every single time is what makes the difference. It's about building a habit of excellence.
The 10-Step Process For a Perfect Installation
- Inspect the New Blade: Check for any damage from shipping and confirm the model number is correct.
- Clean the Mounting Surfaces: This is critical. Use a solvent to remove all oil, rust, and particles from the blade holder and shaft.
- Gather Correct Tools: Have your calibrated torque wrench, feeler gauges, and any specific tools ready.
- Align the Blade Correctly: Use guide pins or markers to ensure the blade is seated in the right orientation.
- Tighten Fasteners: Gently snug the bolts first, then use the torque wrench in a star pattern to apply even pressure.
- Check Blade Clearance: Use feeler gauges to set the precise gap between blades or between the blade and anvil.
- Manually Rotate: Turn the assembly by hand to feel for any binding, rubbing, or imbalance. It should be smooth.
- Run a No-Load Test: Start the machine at a low speed with no material. Listen for unusual noises or look for vibrations.
- Re-Torque After Initial Run: After the machine warms up (15-30 minutes), stop it, lock it out, and re-check the torque on the bolts.
- Document and Schedule: Record the installation date and establish a schedule for the next inspection.
This structured approach transforms blade installation from a routine task into a quality control checkpoint.
What Are The Installation Precautions For Industrial Blades In Special Environments?
Installing a blade in a food plant or a humid factory is different. Standard methods are not enough. These special environments create unique risks for safety, hygiene, and blade life.
In food processing, use only food-grade lubricants and maintain strict cleanliness to avoid contamination. For high-humidity areas, use stainless steel or specially coated blades and fasteners. Always ensure all components and tools are dry before installation to prevent corrosion.
The environment dictates the rules of installation. A procedure that works perfectly in a dry-air factory can be a disaster in another setting. I remember a client in Southeast Asia who processes frozen fish. They were seeing rust spots on their blades just days after installation. The problem wasn't the stainless steel blade itself. The maintenance team was using standard steel fasteners and regular tools. In that cold, high-humidity environment, condensation was constant. This moisture, combined with contact between two different metals (the standard steel bolt and the stainless steel blade holder), created a perfect storm for galvanic corrosion. The less noble metal, the steel bolt, was corroding rapidly and staining the equipment. The solution was a change in both materials and process.
Adapting Installation for Your Environment
-
Food Processing / Cleanroom Environments:
- Hygiene is Paramount: All tools must be dedicated to the clean area or thoroughly sanitized before entry. Use food-grade, NSF H1-registered lubricants and anti-seize compounds.
- Material Compatibility: Blades and fasteners must be made from food-safe stainless steel (like 316 grade) or other compliant materials.
- Traceability: Every installation and maintenance action must be logged. This is a critical part of a company's HACCP (Hazard Analysis and Critical Control Points) plan to ensure food safety. Any failure to comply can lead to product recalls.
-
High-Humidity / Corrosive Environments:
- Fight Corrosion: Use blades and, just as importantly, fasteners made from the same or a more noble corrosion-resistant material. Using 440C stainless blades with 316 stainless bolts is a common and effective combination.
- Keep it Dry: Ensure all components are perfectly dry before assembly. Trapped moisture in bolt holes is a primary cause of crevice corrosion.
- Apply a Barrier: After installation, apply a thin film of a moisture-displacing lubricant or wax-based corrosion inhibitor to the assembly, especially around the fasteners. This creates a physical barrier against the humid air.
By adapting their installation kits and procedures for the specific environment, the fish processing client completely eliminated their corrosion problem and extended the life of their cutting assemblies.
Conclusion
Proper blade installation is a foundational skill. Following these guidelines on safety and procedure protects your team, improves cut quality, extends blade life, and ultimately boosts your operational efficiency and profitability.
Understanding best practices for blade installation can significantly enhance safety and performance in your operations. ↩
Understanding the impact of blade misalignment can help you avoid costly mistakes and improve cut quality. ↩
Setting the correct clearance is crucial for optimal blade performance; find out how to do it right. ↩
Identifying the causes of blade chipping can help you implement preventive measures effectively. ↩
Learn about the critical LOTO procedure to ensure safety during machine maintenance and blade installation. ↩