Skip to content
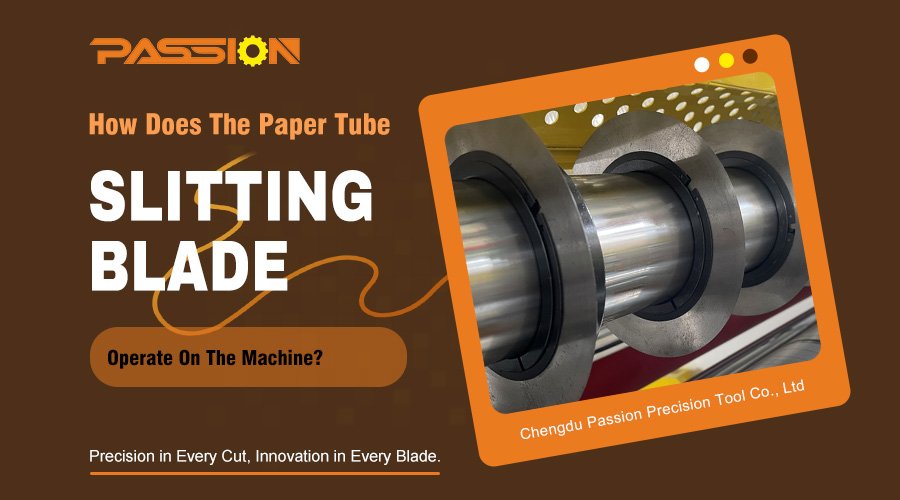
Struggling with uneven paper tube cuts? This leads to wasted material and slows down production. Understanding how your slitting blade operates is the first step toward achieving perfection.
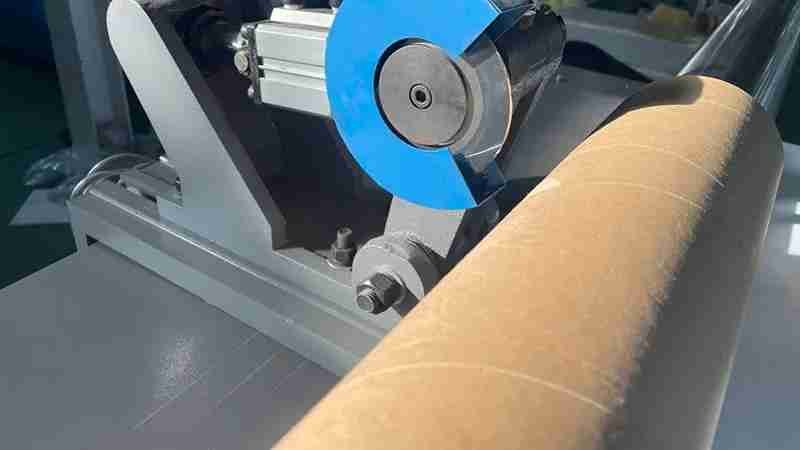
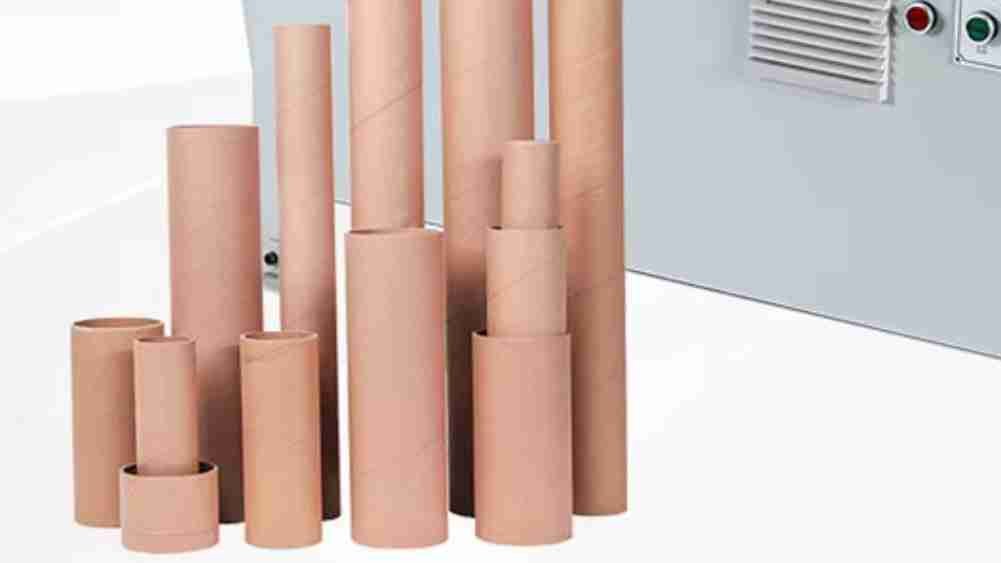
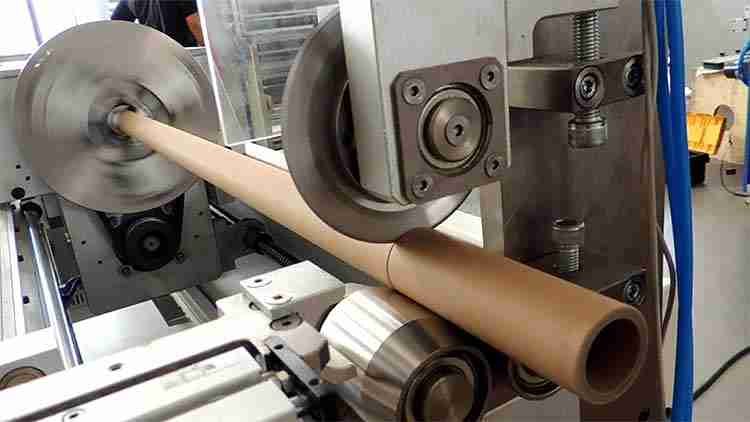
A paper tube slitting blade1 operates by cutting a rapidly rotating paper tube. The blade, typically a circular knife, is mounted and slowly fed into the tube along its axis. This combination of the tube's rotation and the blade's precise inward movement ensures a clean, smooth, and accurate cut.
This sounds straightforward on the surface. But achieving a perfect, clean cut involves more than just a spinning tube and a sharp blade. Many different factors need to work in harmony to deliver the precision your operation requires. Let’s break down the entire process to see what really makes a difference in achieving a high-quality finished product.
What Are The Key Components For Paper Tube Slitting?
Are you unsure which parts of your slitting machine are most critical? Overlooking a single component can compromise your entire cutting process and lead to costly errors. Let’s identify the key components.
The key components for paper tube slitting are the main spindle, which holds and rotates the tube; the slitting blade assembly2, including the blade and its holder; and the blade feed system3, which controls the blade's movement. Proper alignment4 and maintenance of these three parts are essential.
To truly grasp the operation, we need to look at each component’s role. Think of them as a team where each player has a specific job. If one player doesn't perform well, the whole team suffers.
The Main Spindle
This is the foundation of the operation. The main shaft securely holds the paper tube on a mandrel and spins it at a high, consistent speed. Any wobble or vibration in the shaft will directly transfer to the cut, resulting in an uneven or jagged edge. The stability of this component is non-negotiable for precision work.
The Slitting Blade Assembly
This is where the magic happens. The assembly consists of the circular blade itself and the holder that keeps it rigid. The blade's material and sharpness are vital. We at PASSION often recommend different materials based on the application.
| Blade Material | Best For | Key Advantage |
|---|---|---|
| High-Speed Steel (HSS) | General-purpose, lower volume | Cost-effective and tough |
| Tungsten Carbide (TC) | High-volume, abrasive materials | Extreme hardness, longer life |
| Coated Blades | Specialty applications | Reduced friction, better wear |
The holder must clamp the blade securely to prevent any flexing during the cut.
The Blade Feed System
This system controls the slow, steady movement of the blade into the rotating tube. It can be pneumatic, hydraulic, or servo-driven. The feed rate, or how fast the blade moves inward, is a critical parameter. A feed rate that is too fast can crush the tube wall, while one that is too slow can cause excessive heat and blade wear. Precision here ensures a smooth, clean entry and cut.
How Do You Set Up A Paper Tube Slitting Blade For Optimal Performance?
Is your current setup causing poor cuts or making blades wear out too quickly? An incorrect setup can easily damage both your blades and your products, costing you time and money.
For optimal performance, ensure the blade is perfectly perpendicular to the tube's axis. Set the correct cutting angle5 and blade pressure6 for your material. Also, verify that the blade's cutting edge is centered on the tube's radius to avoid deflection and ensure a straight, clean cut.
Getting the setup right is just as important as having high-quality components. I remember working with Carlos, a client in American who runs a large packaging company. He was frustrated because his blades were chipping and his tube ends were frayed. He thought his blades were low quality. Later, we discovered the issue wasn't the blades but the setup. A few small adjustments made a world of difference.
Achieving Perfect Alignment
The first thing we checked was alignment. The blade must be positioned at a perfect 90-degree angle to the paper tube. Even a slight deviation can cause the blade to "walk" or create a helical cut instead of a straight one. Using a precision square to check the alignment and found it was off by almost a full degree. Correcting this immediately improved the cut quality.
Setting the Cutting Angle And Pressure
The angle at which the blade enters the tube is critical. A cutting angle that is too aggressive can tear the paper fibers, creating a rough finish. An angle that is too shallow can increase friction and wear on the blade. The same goes for pressure. Too much pressure will crush the tube, while too little will result in an incomplete cut. I help he adjusted his machine to find the sweet spot for his specific tube wall thickness and material.
Centering The Blade
Finally, ensured the blade tip was perfectly aligned with the center of the tube's axis. If the blade is set too high or too low, it will be pushed away from the material as it cuts. This deflection leads to a concave or convex cut surface. Using a simple centering gauge to adjust the blade height. This final tweak stopped the blade chipping he was experiencing. These three setup steps are crucial for anyone looking to maximize blade life and cut quality.
What Common Problems Occur During Paper Tube Slitting, And How Do You Solve Them?
Are you frequently dealing with burrs7, dust, or cracked tube ends? These common issues disrupt production and lead to high rejection rates, directly impacting your bottom line. Let's fix them.
Common problems include burrs (rough edges), excessive dust8, and crushed or cracked tube ends. These are often solved by sharpening or replacing the blade, adjusting the cutting speed and feed rate, or correcting the blade alignment and pressure to match the material being cut.

Troubleshooting is a daily reality in any manufacturing setting. The key is to know what to look for so you can solve problems quickly. Most problems fall into a few common categories, and the solutions are often simpler than you think. Let's break them down.
The Problem: Burrs And Rough Edges
Burrs, or frayed edges, are usually a sign of a dull blade. A sharp blade cleanly severs the paper fibers, while a dull one tears them.
- Solution 1: Check the blade. If it feels dull or has visible nicks, it's time to sharpen or replace it.
- Solution 2: Check the cutting angle. An incorrect angle can also cause tearing.
The Problem: Excessive Paper Dust
A lot of dust indicates that the blade is grinding the material instead of cutting it. This not only creates a mess but also wears down the blade very quickly.
- Solution 1: The blade is likely dull. A sharp edge produces clean chips, not fine dust.
- Solution 2: Your tube rotation speed9 might be too high for the feed rate. Try reducing the RPM or slightly increasing the blade feed speed to achieve a cleaner shear.
The Problem: Crushed Or Deformed Tube Ends
If the end of the tube looks squashed, the issue is almost always excessive force.
- Solution: Reduce the blade pressure or the feed rate. The blade should cut through the material with minimal force. Think of it as slicing a tomato—you let the knife do the work. Pushing too hard just makes a mess. Proper setup ensures the machine applies just enough pressure for a clean cut without deforming the tube wall.
Conclusion
In summary, a successful tube slitting operation depends on quality components, precise setup, and proper maintenance. Mastering these elements will greatly improve both your efficiency and your final product quality.
Understanding the mechanics of a slitting blade is crucial for achieving precision in your cuts. ↩
Learn about the essential parts of a slitting blade assembly to ensure optimal performance. ↩
Discover how a blade feed system controls the cutting process for better results. ↩
Proper alignment is key to achieving straight cuts; learn how to check and adjust it. ↩
Understanding the impact of cutting angles can help you achieve smoother cuts. ↩
Discover how proper blade pressure can prevent damage and improve cut quality. ↩
Identifying the causes of burrs can help you maintain high-quality production standards. ↩
Understanding dust production can lead to better blade maintenance and cleaner cuts. ↩
Understanding the relationship between rotation speed and feed rate can enhance cutting efficiency. ↩