Skip to content

Struggling with uneven wear and poor cuts? Mounting multiple blades is tricky. Small mistakes can ruin your process, costing you time and money.
Focus on blade dimensions1, clean surfaces2, consistent positioning, correct angles, and dynamic balance tests3. These details ensure your multi-blade system achieves stable, high-precision, and efficient cutting performance.
Getting these installation details right isn't just about good practice; it's about unlocking reliability and efficiency in your entire operation. Let’s dive into what you need to know to get the most out of your multi-blade systems.
How Do Blade Dimensions And Surface Cleanliness Impact Mounting?
Are your blades wearing out too fast? The problem might be a poor fit. Tiny imperfections in the blade or the holder can cause major cutting failures down the line.
Always verify blade dimensions and tolerances4 before installation. Ensure all clamping surfaces are completely free of burrs, oil, and debris. This guarantees a perfect fit and even force distribution for stable cutting.
Blade materials like carbide and high-speed steel5 have different properties and manufacturing tolerances. Even slight variations in thickness or shape can prevent a blade from sitting perfectly flat in the cutter body. A blade that isn't perfectly seated will experience uneven stress, leading to premature wear or chipping. I remember a case with a client in Germany who runs a flexible packaging company. They were experiencing random tears while slitting high-grade plastic film. Their blades were top quality, and their machines were new. While their maintenance team was excellent, they sometimes overlooked cleaning the blade slots on the cutter body during quick changeovers. Small particles of plastic and old lubricant had built up, creating an uneven surface. This tiny amount of contamination was enough to cause the blades to tilt ever so slightly, creating uneven pressure and causing the film to tear. We helped him creat a simple pre-installation checklist, and the problem vanished.
Pre-Installation Checklist
| Step | Action | Why It Matters |
|---|---|---|
| 1. Verify | Check blade dimensions against holder specifications. | Prevents issues from tolerance mismatch. |
| 2. Inspect | Examine blade and holder for burrs or damage. | A smooth surface ensures a flat, secure fit. |
| 3. Clean | Thoroughly clean all contact surfaces. | Removes oil, debris, and chips that cause misalignment. |
| 4. Test Fit | Gently place the blade in the slot to ensure easy seating. | Confirms there are no obstructions before clamping. |
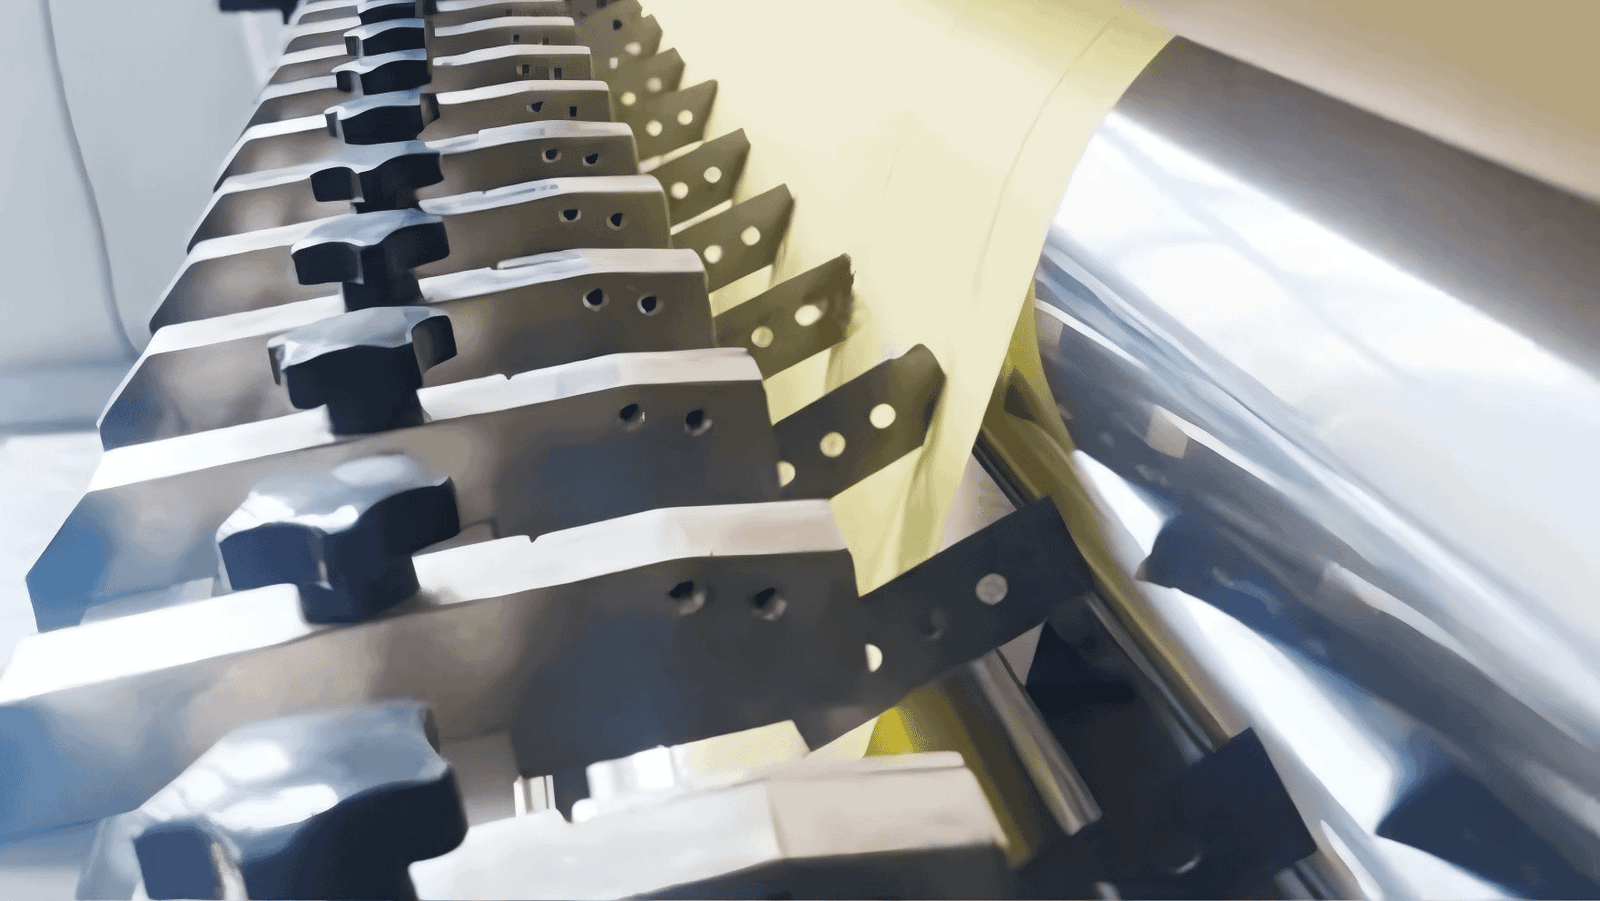
Why Is Consistent Positioning And Clamping Force So Crucial?
Do you see streaks or lines on your finished product? Inconsistent positioning is a likely cause. This unevenness puts stress on both the blade and the material you're cutting.
Use high-quality locating pins and plates for a consistent reference point. Apply even torque to all fastening screws to ensure every blade sits at the exact same angle and height.
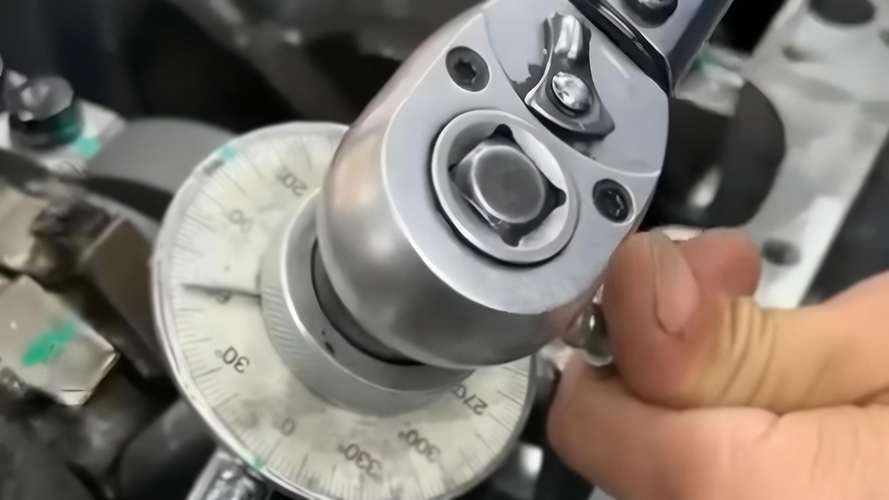
When you mount multiple blades, they must act as a single, unified cutting blade. If one blade is higher, lower, or angled differently than the others, it will do more or less work. This leads to uneven wear, and you'll find yourself changing the entire set because one blade failed early. Uneven clamping force is a common culprit. I once cooperated with a paper mill in Brazil that was getting a "washboard" pattern on their large paper rolls. The reason is that their operators were tightening the blade clamping screws by hand. Naturally, some screws were tighter than others. This slight difference in pressure was enough to alter the blade angles just a tiny bit. Across a wide roll of paper, these tiny deviations added up and created the visible pattern. My recommendation was simple: use a torque wrench. By tightening every screw to the exact same specification, they ensured uniform clamping force. The "washboard" effect disappeared, and their product quality became consistent.
Clamping Force Best Practices
| Best Practice | Description | Impact of Failure |
|---|---|---|
| Use a Torque Wrench | Apply the manufacturer's recommended torque value to every screw. | Uneven force causes blade angle deviation and streaks. |
| Follow a Pattern | Tighten screws in a star or crisscross pattern, like on a car wheel. | Prevents warping of the clamping plate or holder. |
| Inspect Fasteners | Regularly check screws and clamping plates for wear or damage. | Worn fasteners can't apply pressure correctly. |
| Use Locating Pins | Ensure blades are seated firmly against all locating surfaces before tightening. | Prevents blades from shifting during the clamping process. |
How Does The Blade Installation Angle Affect Cutting Performance?
Are your blades chipping or producing rough cuts? The installation angle might be wrong. A blade set at the wrong angle works against itself, causing damage and poor results.
Set the correct rake angle6 based on the blade material and the application. Carbide blades often need a negative rake for support, while HSS blades can use a positive rake for sharpness.
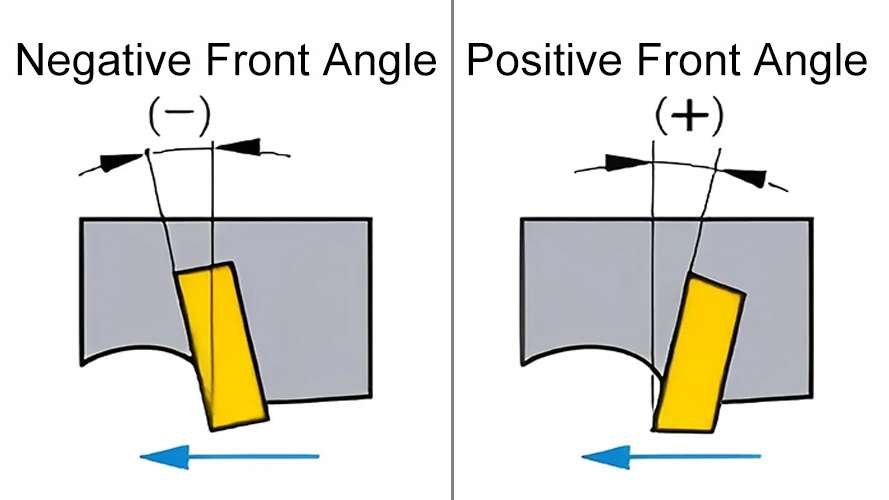
The rake angle is the angle of the cutting face relative to the material. A positive rake angle creates a sharper, more aggressive cut, which is great for reducing cutting forces in softer materials. A negative rake angle provides more support to the cutting edge, making it stronger and better suited for hard or tough materials. Using the wrong angle is a very common problem. A textile manufacturer in Turkey contacted me because their tungsten carbide blades7 were chipping constantly. They were cutting heavy synthetic fabric, which is very abrasive. When they sent me photos of their setup, I saw the issue immediately. Their holders positioned the blades with a slight positive rake. While this might work for natural fibers, it was putting too much stress on the fine edge of the hard but brittle carbide. The cutting edge was essentially being levered away, causing it to chip. We worked together to source new blade holders that provided a slight negative rake angle. This change gave the cutting edge the support it needed to withstand the tough fabric. The chipping stopped, and their blade life more than doubled.
Rake Angle Guide By Material
| Blade Material | Typical Rake Angle | Why It Works | Common Application |
|---|---|---|---|
| Tungsten Carbide (WC) | Negative to Neutral | Provides maximum support to the brittle cutting edge. | Cutting hard metals, composites, abrasive textiles. |
| High-Speed Steel (HSS) | Positive | The tough material can handle a sharper angle for a cleaner cut. | Cutting paper, softer plastics, wood. |
| High-Chromium Steel | Neutral to Slight Positive | A good balance of hardness and toughness for general use. | Food processing, flexible packaging. |
Is Dynamic Balancing Necessary After Mounting New Blades?
Do you experience excessive vibration at high speeds? An unbalanced cutter head could be the cause. This vibration can lead to catastrophic failure, damaging your machine and blades.
Yes, always perform dynamic balancing after installing a new set of blades on a cutter head. This corrects minor weight imbalances, ensuring the cutter runs smoothly, safely, and efficiently at high speeds.
Even if each individual blade is made to exact specifications, tiny weight differences are inevitable. When you mount 10, 20, or even more blades onto a single cutter body, these small differences can add up to create a significant imbalance. At low speeds, you might not notice it. But as you ramp up to full production speed, the imbalance creates a powerful centrifugal force that causes vibration. This vibration leads to poor surface finish, puts immense stress on machine bearings8, and can even cause blade clamping screws to loosen over time. I had a client in Mexico who processes thin aluminum foil. They installed a brand new set of our circular blades and immediately experienced violent machine vibrations at operating speed. They were convinced the blades were faulty. I suspected an imbalance issue. I guided them to a local machine shop that had a dynamic balancing machine. They put the entire assembled cutter head on the machine, which spun it up and identified exactly where the heavy spot was. By drilling a small amount of material from the cutter body opposite the heavy spot, they brought the entire assembly into perfect balance. The machine ran perfectly smooth afterward.
Signs Your Cutter Assembly Needs Balancing
| Symptom | Description | Potential Consequence |
|---|---|---|
| Excessive Vibration | The machine shakes or hums loudly at operating speed. | Damage to machine bearings, unsafe operation. |
| Poor Surface Finish | Chatter marks or wavy patterns appear on the cut material. | Product rejection, poor quality. |
| Premature Blade Wear | Blades chip or dull unevenly and faster than expected. | Increased tool costs and downtime. |
| Loosening Fasteners | Clamping screws or bolts loosen during operation. | Catastrophic failure, blade ejection. |
Conclusion
Proper mounting of multiple blades is all about the details. By focusing on fit, positioning, angles, and balancing, you ensure stability, precision, and efficiency in every single cut.
Understanding blade dimensions is crucial for ensuring a perfect fit and optimal cutting performance. ↩
Clean surfaces prevent misalignment and ensure even force distribution, leading to better cutting results. ↩
Dynamic balance tests ensure smooth operation and prevent excessive vibration, protecting your equipment. ↩
Understanding tolerances helps prevent cutting failures and ensures blades fit properly in the holder. ↩
High-speed steel blades offer unique advantages for specific applications, enhancing cutting performance. ↩
The rake angle influences cutting efficiency and blade longevity, making it crucial for optimal performance. ↩
Carbide blades provide durability and precision, making them ideal for tough cutting tasks. ↩
Healthy machine bearings are vital for smooth operation and can prevent costly downtime. ↩